Fly fishing is a fun and rewarding way to catch fish. It’s not as hard as some people think. With a few basics, you can start enjoying this great outdoor sport.
Fly fishing for beginners is all about learning the right gear, techniques, and where to find fish. You’ll need a fly rod, reel, line, and some flies. Don’t worry if you’re not sure what to get – many shops offer starter kits that have everything you need.
Learning to cast is key. It takes practice, but you’ll get better each time you go out.
Start in your backyard or a park to get a feel for it. Once you’re ready, head to a river or lake and try for some real fish. Remember, it’s called fishing, not catching – enjoy the whole experience!

Table of Content
Key Takeaways
- Fly fishing is easy to start with basic gear and simple techniques
- Practice casting in open spaces before hitting the water
- Enjoy the experience of being outdoors, not just catching fish
The Basics of Fly Fishing
Fly fishing is a fun and rewarding sport. To get started, you’ll need to learn about the essential gear and how to choose the right equipment for your needs.
Understanding Fly Fishing Gear
Fly fishing requires some specific equipment. The main items you’ll need are:
Each piece of gear plays a key role in helping you cast and catch fish.
It’s important to choose quality items that fit your skill level and the type of fishing you plan to do.
You’ll also want some extras like:
- A fishing vest or pack
- Nippers for cutting line
- Forceps for removing hooks
- Sunglasses to help you see fish
Don’t worry about getting everything at once. Start with the basics and add more as you learn.
Fly Rod Types and Uses

Fly rods come in different weights, lengths, and actions. The weight of a rod refers to how heavy the line it’s designed to cast is.
Lighter rods (2-5 weight) work well for small streams and panfish. Medium rods (5-7 weight) are good all-around choices for trout. Heavier rods (8+ weight) are used for big fish or windy conditions.
Rod length affects casting distance and control. Shorter rods (7-8.5 feet) are great for small streams. Longer rods (9-10 feet) give you more reach on bigger waters.
Rod action describes how much the rod bends when you cast. Fast-action rods are stiffer and better for windy days. Slow-action rods are more forgiving for beginners.
Choosing the Right Reel
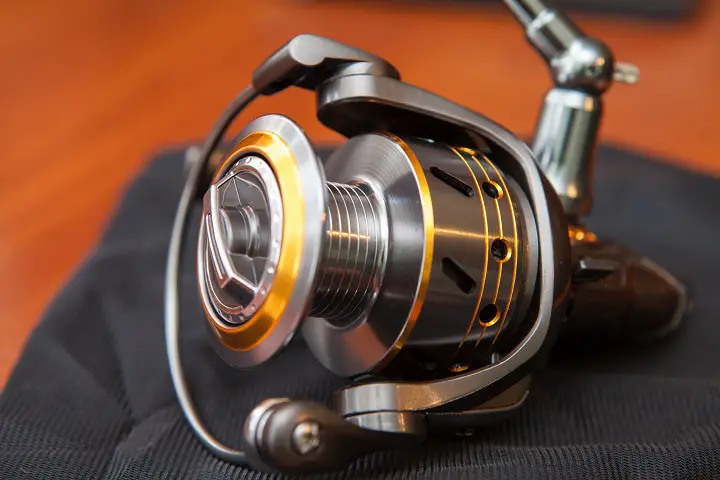
A fly reel holds your line and provides drag to tire out fish. There are three main types:
- Click and pawl reels are simple and work well for small fish.
- Disc drag reels offer smoother drag for bigger fish.
- Sealed drag reels are best for saltwater fishing.
For most beginners, a basic disc drag reel is a good choice. Look for a reel that matches your rod weight and has enough capacity for your line plus backing.
Make sure the reel balances well with your rod. A balanced setup will feel comfortable to cast all day.
Selecting Fly Lines and Leaders

Fly lines come in different weights to match your rod.
There are also various types:
- Weight-forward lines are versatile and easy to cast.
- Double taper lines are good for delicate presentations.
- Shooting lines help you cast farther.
For most beginners, a weight-forward floating line is a great start. This type works well for dry flies and nymphs in many situations.
Leaders connect your fly line to your fly. They taper down to a fine tip called the tippet. You can buy pre-made leaders or make your own.
A 9-foot 5X leader is a good all-around choice for trout fishing.
As you gain experience, you can try different lengths and sizes to match fishing conditions.
Fly Casting Techniques
Mastering basic fly casting techniques is key to successful fly fishing. These methods will help you place your fly accurately and tempt fish to bite.
The Overhead Cast
The overhead cast is the most basic fly casting technique.
To do it, start with your rod tip low, near the water. Smoothly lift the rod back to the 2 o’clock position. Pause briefly to let the line straighten behind you.
Then, bring the rod forward with steady acceleration. Stop the rod at the 10 o’clock position. This motion will propel the line and fly forward.
Practice this motion without a fly at first. Focus on smooth, steady movements. Avoid using too much wrist – the power comes from your forearm. Try to keep your casting arc consistent.
A wider arc works for longer casts, while a narrower one suits shorter distances.
With practice, you’ll develop a feel for the right timing and power.
Roll Casting Essentials
Roll casting is perfect for tight spots with obstacles behind you. It’s also great when you’re wading deep or fishing from a boat.
To roll cast, start with your rod tip low and about 10 feet of line in front of you. Slowly lift the rod tip up and back to the 2 o’clock position. This creates a D-loop of line behind you.
Next, bring the rod forward with a smooth, accelerating motion. Stop the rod at the 10 o’clock position. The line will roll out in front of you.
Key points for a good roll cast:
- Form a clear D-loop behind you
- Pause at the top of the backcast
- Use smooth acceleration on the forward cast
- Aim your cast high for better results
Sidearm Casting Tips
Sidearm casting is useful when you need to cast under overhanging trees or in windy conditions. It’s similar to the overhead cast, but your rod moves horizontally instead of vertically.
To do it, start with your rod tip low and to one side. Bring the rod back parallel to the ground, stopping at about 3 o’clock. Pause briefly, then bring the rod forward with smooth acceleration.
Stop the rod at about 9 o’clock. This will send your line out low over the water.
Remember these tips for sidearm casting:
- Keep your elbow close to your body
- Use your forearm, not your wrist, for power
- Practice to find the right stopping points
- Adjust your cast height based on obstacles
With practice, you can combine these techniques to handle various fishing situations.
Essential Knots for Fly Fishing
Learning a few key knots is crucial for fly fishing success. These knots will help you set up your gear and attach flies securely.
The Clinch Knot
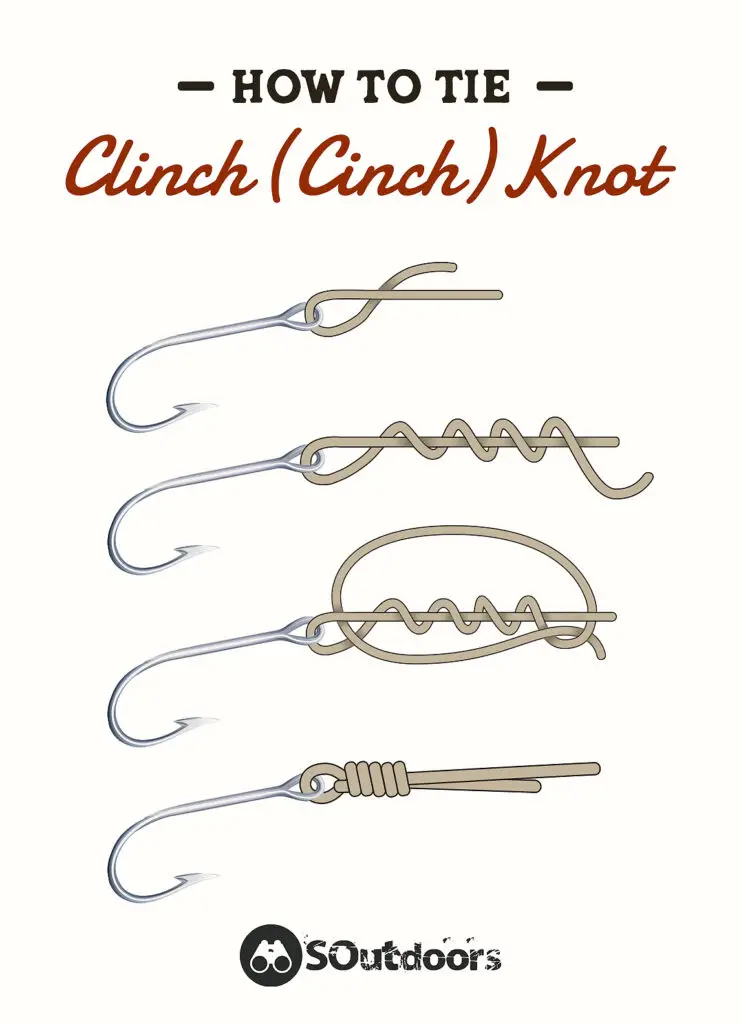
The clinch knot is a must-know for fly anglers. It’s used to tie your fly to the tippet.
To tie it, thread the line through the eye of the hook. Wrap the tag end around the standing line 5-7 times. Pass the tag end through the loop near the eye.
Wet the knot and pull it tight. Trim the excess line close to the knot.
This knot is strong and easy to tie, even with cold hands. Practice it until you can do it quickly.
The clinch knot works well for most fishing situations.
It’s especially good for smaller flies and lighter tippets. For larger flies or stronger tippets, you might want to use the improved clinch knot.
The Surgeon’s Knot

You’ll use the surgeon’s knot to connect your leader to your tippet. It’s simple and strong.
Start by laying the ends of the two lines side by side. Make a loop with both lines. Pass the ends through the loop twice.
Moisten the knot and pull all four ends to tighten. Trim the tag ends close to the knot.
The surgeon’s knot works well for joining lines of similar diameters.
If you’re joining lines with very different diameters, you might want to try a different knot.
The Loop Knot
The loop knot gives your fly more movement in the water. This can make your fly look more lifelike to fish.
To tie it, make an overhand knot in your tippet about 6 inches from the end. Pass the tag end through the eye of the fly and back through the overhand knot.
Wrap the tag end around the standing line 3-4 times. Push the tag end back through the overhand knot.
Wet the knot and tighten it carefully. Trim the tag end close to the knot.
The loop knot is great for streamer flies and larger dry flies.
It allows the fly to move more freely, which can trigger more strikes from fish.
Selecting Flies
Choosing the right flies is key to success in fly fishing. You’ll want to match the insects that fish are feeding on and use patterns that imitate their natural prey.
Dry Flies vs. Wet Flies
Dry flies float on the water’s surface, while wet flies sink below. Dry flies like Parachute Adams and Elk Hair Caddis work great for luring fish to the surface. They’re easier to see, making them good for beginners.
Wet flies imitate insects underwater. They include nymphs and streamers. Wet flies can be more effective when fish aren’t feeding on the surface.
Try both types to see what works best. Carry a mix of dry and wet flies in your box. This lets you adapt to changing conditions on the water.
Nymphs: When and How to Use Them
Nymphs imitate immature aquatic insects. Fish feed on these bugs most of the time, making nymphs very effective.
Use nymphs when you don’t see fish rising to the surface. They work well in deeper, faster water. Try different sizes and colors to match local insects.
A few essential nymph patterns to start with are Pheasant Tail, Hare’s Ear, and Copper John. These versatile flies catch fish in many situations.
Fish nymphs near the bottom where trout often feed. Use a strike indicator to detect subtle takes.
Streamer Patterns for Larger Fish
Streamers imitate small fish and other larger prey. They’re great for catching bigger trout and bass.
Use streamers when targeting larger fish or in murky water. Cast them across the current and retrieve them with short strips.
Wooly Bugger and Clouser Minnow are two popular streamer patterns. They come in various colors to match local baitfish.
Streamers work well in deeper pools and near structures where big fish hide. They’re also effective when fish are aggressive or actively feeding.
Try different retrieves to find what triggers strikes. Vary your speed and add pauses to imitate injured prey.
Understanding Fish Behavior
Knowing how fish act in their habitat helps you catch more. Fish habits change based on water and weather. Learning to spot these patterns makes you a better angler.
Reading the Water
Trout like spots with food and safety. Look for calm areas near fast water. These are great feeding zones. Check out rocks, logs, and deep pools.
Riffles are shallow spots with bumpy water. They hold lots of bugs for fish to eat. Trout often hang out here.
Don’t ignore banks and undercut areas. Fish hide there to stay safe from birds. Cast close to these spots for a good chance at a bite.
Hatch Matching for Success
Matching the hatch means using flies that look like local bugs. Watch the water to see what insects are around.
Different bugs hatch at different times. Learn the hatch patterns in your area. This helps you pick the right fly.
Carry a variety of fly sizes and colors. Sometimes fish are picky. Having options lets you adjust if one fly isn’t working.
Feeding Patterns of Trout
Trout eat more at dawn and dusk. These times are great for fishing. The low light makes trout feel safer to feed.
Water temp affects how trout eat. They’re most active in water between 50-65°F. In colder water, fish deeper and slower.
Trout often face upstream to catch food floating by. Cast above where you think fish are. Let your fly drift naturally to them.
Fly Fishing Etiquette
Fly fishing etiquette is key to having a good time on the water. It helps keep the sport enjoyable for everyone and protects the fish and their habitat.
Respect the Environment
When you’re out fly fishing, treat nature with care. Don’t leave trash behind. Pick up any litter you see, even if it’s not yours.
Stay on marked trails to avoid damaging plants. Wade carefully to protect fish homes in the stream bed.
Be quiet and move slowly. Loud noises and sudden movements can scare fish. They also disturb other anglers and wildlife.
Set up your gear away from the water’s edge. This gives other anglers space to fish and keeps the banks from eroding.
Give other anglers room. If someone’s fishing a spot, move on to another area. There’s usually plenty of water for everyone.
Catch and Release Best Practices
Catch and release helps keep fish populations healthy. Use barbless hooks to make removal easier and less harmful.
Keep the fish in the water as much as possible. Wet your hands before touching them to protect their slime coat.
Use a net with soft, knotless mesh. This is gentler on the fish’s scales and fins.
Remove the hook quickly and carefully. If it’s deep, cut the line close to the fish’s mouth.
Support the fish in the water facing upstream until it swims away on its own. Don’t release fish in fast water where they might get swept away.
Safety While Fly Fishing
Staying safe while fly fishing is crucial for an enjoyable experience. Proper clothing and careful wading techniques can help prevent accidents and keep you comfortable on the water.
Appropriate Attire for Various Conditions
When fly fishing, dress for the weather and water conditions. In cold weather, wear layers to stay warm. Start with a moisture-wicking base layer, add insulating mid-layers, and top with a waterproof outer layer.
For sunny days, wear a wide-brimmed hat and polarized sunglasses to protect your eyes from glare. Apply sunscreen to exposed skin.
Choose waders that fit well and match the water temperature. Breathable waders work well in warmer conditions, while neoprene waders are better for cold water.
Wear sturdy wading boots with good traction. Felt soles provide grip on slippery rocks, but rubber soles are better for areas where felt is restricted due to invasive species concerns.
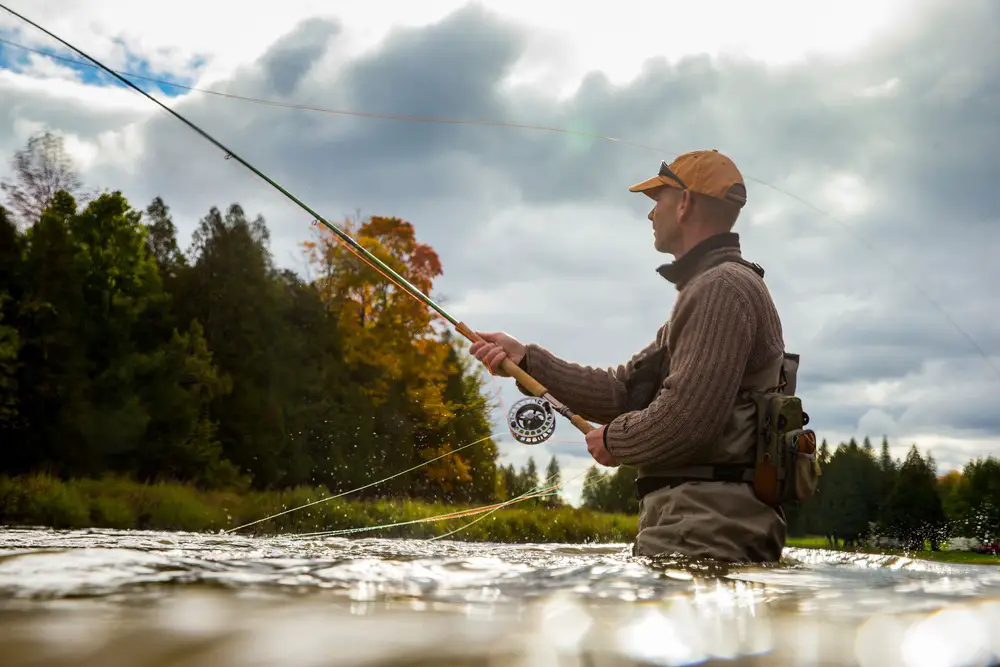
Wading Rules and Techniques
Before entering the water, assess the current and depth. Use a wading staff for extra stability, especially in swift or unfamiliar waters.
Wade slowly and carefully. Take small steps and keep your feet shoulder-width apart for balance. Point your toes slightly upstream to reduce resistance against the current.
Don’t wade deeper than mid-thigh in swift water. If you lose your footing, turn onto your back with your feet downstream to avoid foot entrapment.
Be aware of your surroundings. Watch for sudden drop-offs, slippery rocks, and submerged obstacles. If you’re unsure about a spot, don’t risk it.
Always wear a wading belt to prevent water from filling your waders if you fall. This simple step can save your life in deep or fast-moving water.
Planning Your Fly Fishing Trip
Getting ready for a fly fishing trip takes some thought. You’ll need to pick a good spot, think about the time of year, and make sure you have the right papers. Let’s look at how to plan your adventure.
Choosing Your Location
Picking the right place to fish is key. You have lots of options. Rivers, lakes, and streams all offer different experiences. Think about what kind of fish you want to catch.
Northern California has great spots in Yosemite and Sequoia National Parks. These areas have beautiful scenery and good fishing.
If you’re new to fly fishing, look for places with easy access. Avoid spots with fast water or tricky currents. Ask local fishing shops for tips on good beginner areas.
Understanding Seasonal Variations
The time of year affects your fishing trip a lot. Fish act differently in each season. In spring, fish are more active as the water warms up. Summer can be good, but water levels might be low.
Fall is often a great time for fly fishing. Many fish are feeding more to get ready for winter. Winter can be tough, but some fish are still active.
Check the weather and water conditions before you go. This helps you pack the right gear and choose the best flies.
Licenses and Regulations
You need the right papers to fish legally. Most places require a fishing license. You can usually buy these online or at local shops.
Rules can change based on where and when you fish. Some areas have catch limits or size rules. Others may only allow catch and release.
Check the local fishing regulations before your trip. These rules help protect fish populations. Following them keeps fishing good for everyone.
Remember to bring your license and know the rules. It’ll help you avoid fines and enjoy your trip more.
Conclusion
You’re now ready to start your fly fishing journey! Remember, it’s all about having fun and enjoying nature.
Don’t worry if you don’t catch anything at first. Practice makes perfect. Focus on your casting technique and keep trying new spots. Be patient and stay positive. Every cast is a chance to learn and improve. Make sure you have the right gear. A good rod, reel, and flies are key.
Don’t forget your hat and jacket to stay comfortable.
Try different types of fly fishing. You might like saltwater, freshwater, or Spey fishing. Each offers unique challenges and rewards.
Keep learning and exploring. There’s always more to discover in the world of fly fishing. Happy fishing!