Mountain biking is amazing!
From hitting the trails of a big hill, a mountain, scenic off-road areas, or even a terrain park, you’re sure to be enticed by the wonders of nature and breaths of fresh air.
Most people seem to think that mountain biking only has to be done up a hill, but it’s not true at all, almost any off-beaten path will provide you with nearly the same experience. I can almost guarantee that you’ll find amazing scenery and plenty of exercise regardless of where you go.
Yet, if you’re lucky enough to live near mountains or even hills, you’ll find yourself with the additional benefits of awe-inspiring panoramic views, dirty muddy trails, and thrilling downhill tracks that will invigorate your spirit.
If all these benefits appeal to you, you’ll first need to prepare yourself though. Because as with any other extreme sport, mountain biking can be dangerous if the necessary precautions aren’t taken ahead of time.
For that reason, I’ve gathered a list of the best advice I’ve gotten during my travels as a mountain biker and made them readily available for you:
By preparing yourself beforehand you can maximize your enjoyment. But, before you set out on the road, please read up on the different types of trails you’ll encounter.
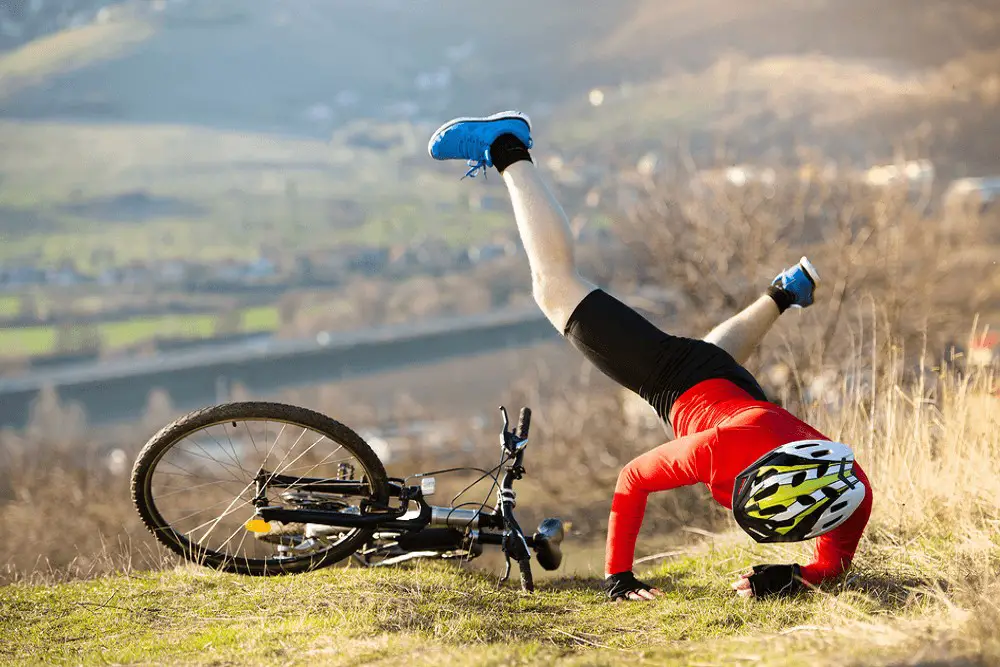
Table of Content
Single, Doubles, and Terrain Tracks
- Terrain parks – I would recommend avoiding these at the beginning, this kind of trail has all sorts of features that are meant to be tackled by experienced riders. But, if you’d like to see one you can expect jumps, banks, tight corners, scary downhill tracks, and even halfpipes. I’m actually rather fond of these types of trails.
- Double tracks – As the name denotes, these tracks are capable of fitting two riders side-by-side. Additionally, the extra width, lack of hazardous terrain, and the ability to ride next to another rider make these the perfect trails for newbies that are looking to get their feet wet in the world of outdoor biking.
- Single Tracks – The basic beginner track is known as the single track. Typically, you’ll find that a single track is a one-way road and often has simple pathways and terrains.
Neutral and Attack Positions
Mountain biking requires riders to be familiar with two types of riding stances. If you want to be successful at mountain biking, you’ll need to exercise good judgment and understand the benefits of both types. The first one is the neutral position which is good for shifting your stance and allows for a comfortable ride. The second one is the attack position which keeps you ready for any of the more risky parts of your journey.
1. Attack Position
- Ensure you put equal amounts of weight/pressure on both pedals
- Stay in a semi-standing position with your body off the seat and your hips shifting towards the rear.
- Your back should be almost parallel to the ground and flat.
- Keep your fingers on the brakes at all times and hold your handlebars firmly (but, not too tightly) to ensure you don’t lose your grip. You should be able to press both brakes with one or two fingers.
- Keep your eyes open and look at the place you want to go without getting distracted. Humans tend to gravitate towards the direction of their eyes and if your vision strays then you could get injured.
As you can tell from this particular stance, it will prepare you to tackle rough terrains and unexpected bumps. The attack position also allows you to shift your weight whenever you go uphill or downhill. If you shift forward and over the rear wheel, you’ll gain additional traction to maintain momentum. On the contrary, if you’re going downwards, shift your weight to behind the saddle and you will avoid potentially flipping over the handlebars in case of an accident. An additional benefit to the attack position is that it also provides you with the ability to jump off the bicycle if things become too dangerous.
2. Neutral Position
- Similar to the attack position you’ll want to ensure you put the same amount of weight on the pedals from both legs.
- Slightly bend your joints to absorb impact better. If you’re too stiff you could hurt yourself.
- Never take your fingers off the brakes.
- Eyes forward!
The neutral position allows you to comfortably enjoy the non-technical parts of your trail. This particular position allows your body to transition easily into attack mode for when things get hairy.
Shifting Gears

Going up and down the hills is exhausting, but luckily mountain bikes can shift gears to help you out. By learning how to properly shift gears you’ll avoid becoming not only damaging your bike, but also travel more effectively. When you’re learning how to mountain bike you need to keep in mind a few aspects of shifting gears that will prepare you in the long run for the trails and treks.
Always practice your shifting, by frequently changing gears in a safe environment you’ll develop some muscle memory that will save you time in the long run. By the time you’re used to shifting gears, you’ll pretty much do so automatically by virtue of muscle memory.
It’s also important that you aren’t changing gears once you’re in the hills as doing so in the middle of a hill will actually slow you down and prevent you from maintaining your rhythm. Additionally, the added stress of shifting while on a hill can actually break and or pop the chains off the bike.
Also, don’t feel bad if you aren’t hitting the heavier gears on hills as you would much rather spin more than try to exhaust yourself trying to go up a hill to any avail. Once you have found a weight you’re comfortable with, tackle the hill at your heart’s content, but try to avoid cross-chaining.
Cross-chaining is what happens when you have the big chain ring in the front stretched out awkwardly from the small one (or vice-versa) this will actually damage your chain.
However, even with the knowledge of cross-chaining, don’t hesitate to use all the gears whenever you need to change the difficulty of your trek. If you’re keeping your eyes forward, you’ll be able to predict the changes in terrain and adjust accordingly and maintain the momentum.
Finally, never stop pedaling when shifting gears. If you’ve ever owned a gear bicycle in the past, you’ll know that when you stop pedaling and shift gears, you can either get hurt or break the chain. It’s dangerous, so try to avoid it at all cost.
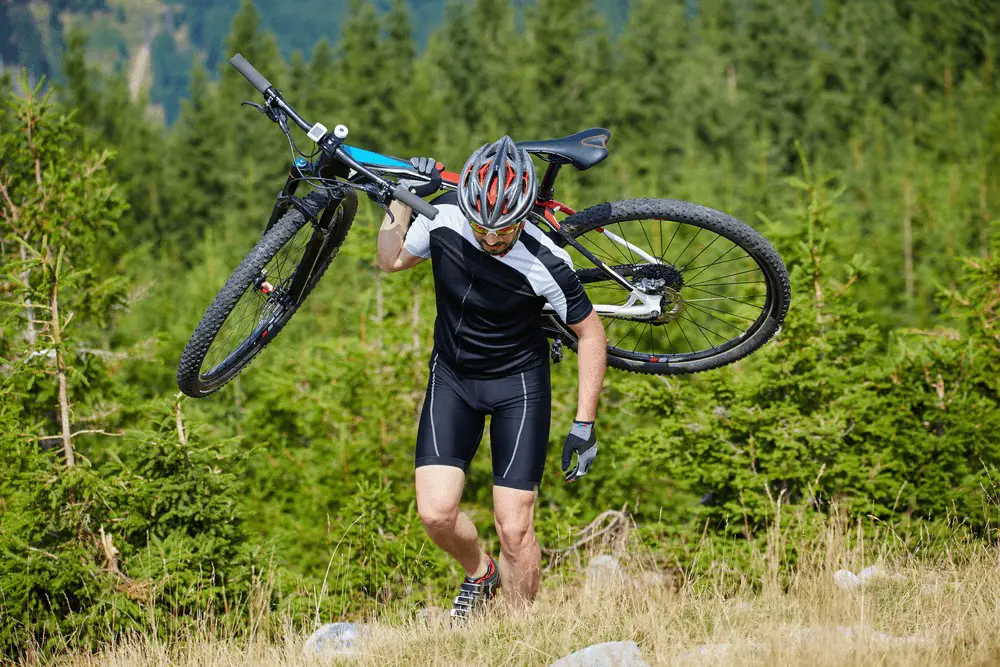
Carry your Bike!
I don’t care how proud you are of yourself, if you get stuck in a difficult situation, don’t hesitate to carry your bike and walk away. You are not competing with anyone (especially when you’re a newbie) and you’ll find some trails that have parts that can only be walked. Worst case scenario, your bike is broken down and you need to carry it somewhere safe for repairs.
Brush up on Maintenance and Repairs
When you’re starting out on mountain biking, it’s good to at least brush up on rudimentary repairs and bike maintenance. Due to the nature of the sport, the rough terrains, and regular wear and tear, you’ll find that mountain bikers tend to do more maintenance on their bikes than regular riders. Learn how to change a tire, and fix a flat, and carry spares of basic components so you can at least fix broken (or fallen) chains.
Break out the Brakes
The concept of braking is really easy. When you press the levers, you’ll slow down and gain better control. You might think that it’s a no-brainer, but judicial use of the brakes can save your life. Trust me; there is a good reason why I always tell riders to keep their fingers on their brakes.
First thing you must do, is to familiarize yourself with the brakes on the forward and rear tires. If you don’t become accustomed to them you might find yourself flipping over your front tire due to the laws of physics. In order to practice braking, use a controlled grip and don’t squeeze too hard unless you’re prepared to skid, do so in an even terrain until you’re comfortable enough with the momentum and then move on to complicated terrain like muddy trails.
During mountain biking, apply equal amounts of pressure to both brakes simultaneously. Control your grip and slow down at an even pace, and avoid fully squeezing them as this will prevent skidding on the mountain trails (which is extremely risky).
Keep in mind the following when you do brake:
- Move your hips back and brace yourself
- Keep a slight bend to your elbows and knees
- Drop your heels
- Keep a steady grip in your handlebars to maintain control
Always apply your brakes in a judicious manner as the careless application of them can cause injury to other riders or yourself, especially when in a group (similar to driving on the highway, a sudden application of brakes can cause a collision). Whenever you approach a turn, brake just before hitting the turn and use the remaining momentum to do a controlled exit.
As a beginner, I’m almost certain you’ll be using your brakes whenever your approach obstacles, but don’t hesitate and come to a complete stop as the remaining momentum will actually push you over these riskier parts.
Trust Momentum and Stay Flexible
The attack position is actually one of flexibility and fluidity. Whenever the terrain becomes challenging you’ll actually be able to clear the sections easily with the proper use of accumulated momentum. My best advice is that you stay loose and let the bike do its job. On technical terrain, you’ll actually want the bike to have room for movement. I recommend you let the bike flow instead of trying to maintain absolute control over it.
Understanding Falls
Look everyone falls, there is no shame in it, and it will happen to you at least once. As with many extreme sports, you’ll want to tuck in your arms instead of trying to catch yourself. You’ll avoid breaking your arms, wrists, collarbones or worse by simply hitting the ground instead of stretching out your arms. Once you’ve fallen, clean yourself up, check for any injuries, and ensure your bike is in working condition. It’s possible that after a fall (or collision) your bike might need repairs and as I mentioned earlier it’s good to have tools just in case.
Tools and Supplies
The preparations for mountain biking are nearly identical to those of going on a regular hike. When preparing to go on a trail, you bring supplies that can help you survive for long enough to find help if worst comes to worst. But, first find a bag large enough to carry the following items:
- Water – Hydration is life, and if you don’t carry enough water to endure your trail, you’re going to suffer for it. Bring a minimum of 2 liters of water per 3 hours of riding. Keep in mind the temperatures and climate and adjust as required. Hotter trails require more water than cooler ones. Additionally you can invest in a hydro pack that can attach to your back or find a backpack with an integrated one.
- Food – If you’re going on a long trip, bring some snacks and other calorie packed food items. These items will leave you satisfied and provide you with the energy required to complete your journey.
- Multi-Tool – A multi-tool will allow you to unscrew chains or tighten screws/bolts. While it’s not going to be required on every trip, you’re better off having one than not.
- Cellphone and portable chargers: If you’re ever planning on taking a trip somewhere, ensure you have a fully energized and ready to go phone in case of emergencies. Failing that, bring a portable battery or two in case the energy runs dry during the trip, there might be low signal spots during the trail, but worst case scenario you can use it to navigate through the GPS features.
- Tire levers – If you find yourself with a flat, this tool will allow you to remove the inner tube with ease. I recommend plastic, but metal ones work well too. I recommend bringing at least 3 of these.
- Inner tube – Bring 2 of these at least and make sure it’s the right size for your tires.
- Hand-pump – It doesn’t matter if you have enough tire levers and tubes, without a pump you’re not really going anywhere.
- First-aid kit – You might fall and get injured, don’t ever forget to bring one for minor cuts and bruises.
Once you’ve properly outfitted a nice little bag of supplies, keep in mind the etiquettes of mountain biking and stay safe.
Be Polite!
Every sport has etiquette and mountain biking is no different. Before you set off on a trail, read the rules of the road and make sure:
- Make your presence known to other riders as to avoid sharp turn collisions or such.
- Slow down for pedestrians and give ample space for them to travel.
- Federally protected areas are off-limits due to federal law.
- Cyclist going uphill have right of way!
- Only ride on trails that are open and ensure you don’t trespass.
- Pay attention to the recommended speed regulations.
- Don’t overestimate your ability, if you feel a trail is beyond you trust those feelings.
- Leaving trash or remains is considered bad manners at home and on the trails.
- When passing ensure both riders have plenty of space.
- Watch out for animals, a lot of wildlife can be found in these trails and you don’t want to scare them.
- Never fall into a false sense of security, mountain biking is an extreme sport and should be treated as such.
- I recommend you stay on the existing trails- you could potentially endanger yourself and others by trying to create a new one.
- Muddy trails can be damaged by bikes, if you find yourself traveling through one, try to find alternative paths.
- Keep a good stash of supplies with you to both repair the bicycle and to keep you safe.
- Use proper protective equipment.
The basics on this list should get you started on mountain biking, but you can always do more.
Just keep in mind the types of trails you’ll encounter, and consider your levels of experience before tackling the challenging ones. Stay at the ready, and shift positions as needed and you will find yourself having a safe and exciting ride filled with wonderful views.
Don’t be too proud to shift gears, fall, carry your bike, and even do some repairs on the side as your safety is the number one priority.
Exercise careful judgment when using your brakes and be mindful of your surroundings, you don’t want to hurt yourself or others by braking too suddenly. Bring ample levels of supplies, and keep in mind that it’s always better to bring one or two extra instead of finding yourself lacking in them. But, most importantly, always act politely towards your fellow riders.
You’re not the only one hitting the trails and by keeping a positive mindset and etiquette, you’ll ensure the safety of yourself and others.
These tips and more should keep you safe on your next mountain biking adventure.