Many types of modern fish finders rely on advanced sonar technology to help anglers locate fish. Sonar transmits sound waves that hit the objects in the water and reflect their images back to the device screen. To rip the benefits, you must first learn how to use a fish finder and interpret its images.
Modern technology is meant to help people. That is why modern sonar was introduced to fishing. Fish finders help anglers become the best they can be – it is as easy as that.
If you are an avid fisherman like me or plan to become one, you should consider investing in the best fish finder. Of course, it would be wise to learn more about sonar technology before you open your wallet. You don’t want to regret your decision later on, do you?
Do not worry, though. I will teach you how a fish finder works and how you are supposed to read it without getting into unnecessary overwhelming technical details. I know what I am talking about since I successfully use fish finders to catch more fish than ever before.
Just keep scrolling, and by the end of this article, you’ll learn a lot of what you need to know about sonar fishing technology and its use and benefits!
How Do Fish Finders Work?
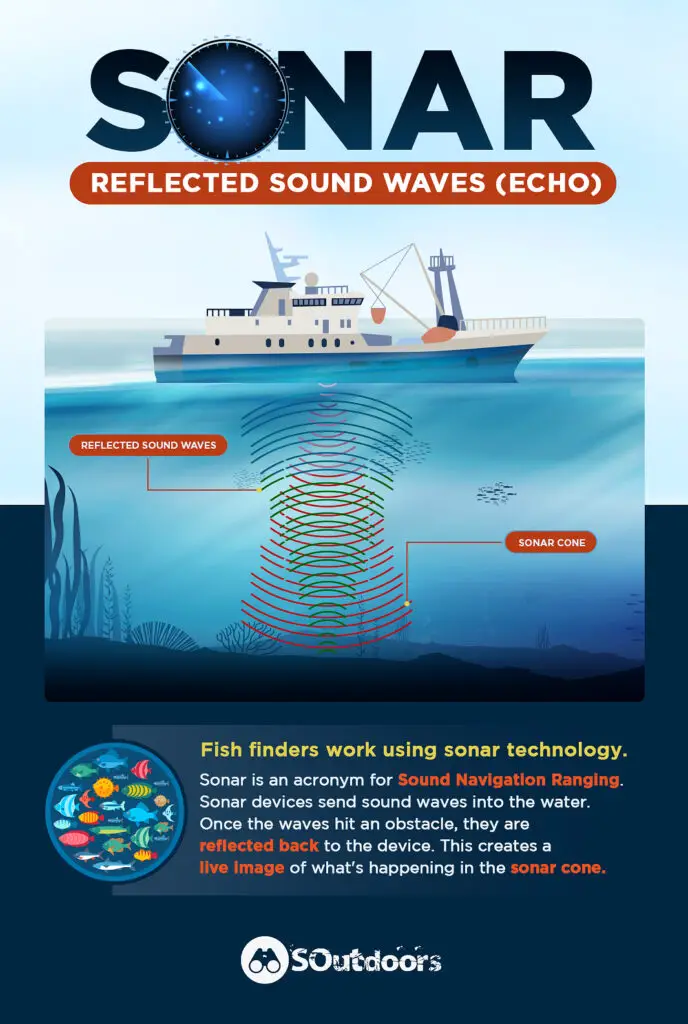
A fish finder works thanks to sonar technology. As explained by the American Oceans Organization, sonar is actually an acronym for Sound Navigation Ranging, which is quite self-explanatory term. What does that mean?
The Discovery of Sound in the Sea website, developed by the University of Rhode Island’s Graduate School of Oceanography, describes the process more closely and explains how sonar or fish finder devices send sound waves into the water. These waves travel through space in the form of pulses until they hit some obstacle, in which case they are reflected back to the device.
The process repeats a few dozen times every second, generating a live image of everything happening in the sonar cone.
If you are wondering what a sonar cone is, I’ll try to explain that too. Namely, sound does not travel in a straight line as light but rather in waves that become wider the deeper they go, and so they form a cone shape.
Sonar can also measure the distance between the point of origin (i.e. your boat) and the object it reflects off of. It is done by measuring the time needed for the sonar beam to hit the object and travel back up.
The sonar device measures the strength of the returning pulse too. Why is that important? Well, the stronger the received pulse is, the harder the object is that the sound waves hit and reflect off of. In this way, you can get information regarding what kind of objects there are in the water around your boat – including fish, rocks, and underwater vegetation.
How do returning pulses convert into a picture on your screen?
I must admit that I have had trouble grasping this concept too. The simplest explanation is that the returning sound pulses convert into electrical signals that are then sent to the receiving circuit of your device. The weak signals are amplified and processed, generating the images shown on the device screen.
You can find out more details about sonar imaging as sound reflection if you watch the video below:
What Are Fish Finders Made Of?
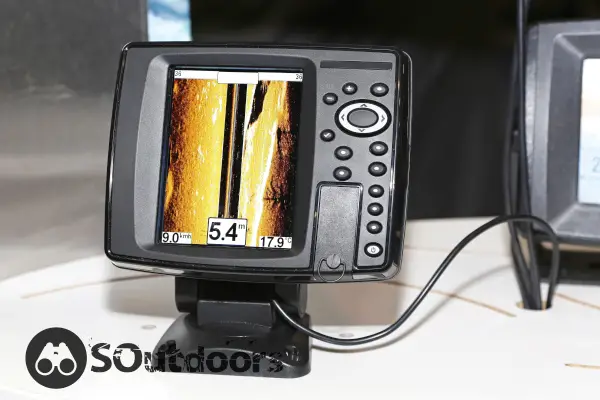
According to Furuno, a Japanese manufacturer of marine electronics that was founded in 1938, a fish finder consists of two main parts:
- The transducer
- The processor (main unit with a screen)
Most modern finders sell as a fish finder GPS combo since they feature an internal or external GPS receiver. I also prefer using a fish finder GPS combo since I spend a lot of time in the open water. There are other accessories you can connect to your fish finder, such as Bluetooth, 360 Imaging, or Panoptix. You might also need an adjustable mount if planning to use your fish finder for ice fishing.
What Is A Transducer?
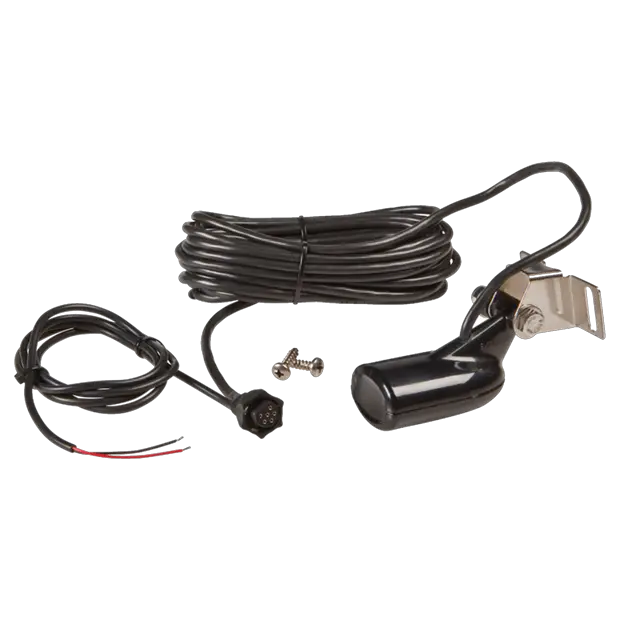
I have learned all I know about transducers from an excellent guide to transducer technology issued by the Airmar Technology Corporation. The transducer is a part of the sonar device that holds piezoelectric crystals. When the transducer vibrates at a specific frequency, the pulses travel through the water until they hit an underwater object. As soon as this happens, the pulsations travel back to the crystals and make them vibrate again. The received signal is then passed to the main unit or the processor for further interpretation.
Different transducers produce different frequencies. Generally, for fishing purposes, the frequencies range from 50 kHz to 300 kHz. Modern CHIRP transducers usually operate in the 150 – 200 kHz range.
Different types of transducers can be positioned differently on your boat too. They do not have to be in the water at all. For example, in-hull transducers are located inside the boat since their frequencies can pass through the hull into the water. If you opt for such a transducer, make sure it can transmit through your hull, as this depends on what material the hull is made of.
The other option is to buy a trolling motor mount transducer. As you can already assume, this transducer attaches to the side of your boat’s motor or inside its propeller hub.
According to CH Marine, a marine equipment retail store that has been in business for more than 135 years, the most popular transducers are the so-called transom-mounted transducers that attach to the outer side of the boat hull. They come equipped with an adjustable bracket for an easy and secure connection.
The sonar beams that the transducer sends out can be both wide and narrow. What’s the difference?
Wide sonar beams have an angle between 40 and 60 degrees. They are ideal for scanning a large area but deliver only a basic picture of what’s happening underneath the water’s surface. They work best in shallow areas.
Narrow sonar beams have an angle of 10 to 20 degrees, which is much closer to a straight line. They can go very deep into the water. The Cornell University article confirms that the greatest advantage of a narrow sonar beam is that it delivers a much higher resolution and thus a more detailed picture too. So, if your focus is on accuracy rather than covering large areas of water, opt for a narrow beam.
What Is A Processor?
The processor is a small computer that interprets signals received by the transducer. As explained by Dr. Martin A. Mazur from Penn State University, its role is to process the sonar data coming from the transducer and transform it into the digital signals you can then observe on the screen.
The processor screen is where you get to see what’s happening underneath or around your boat. Depending on how sophisticated your device is, this image can be a real-time portrayal of the underwater world.
Types Of Fish Finders
There are three different types of fish finders depending on their sonar technology. Each type is unique and offers anglers a different experience. Let’s see what they are!
2D Sonar
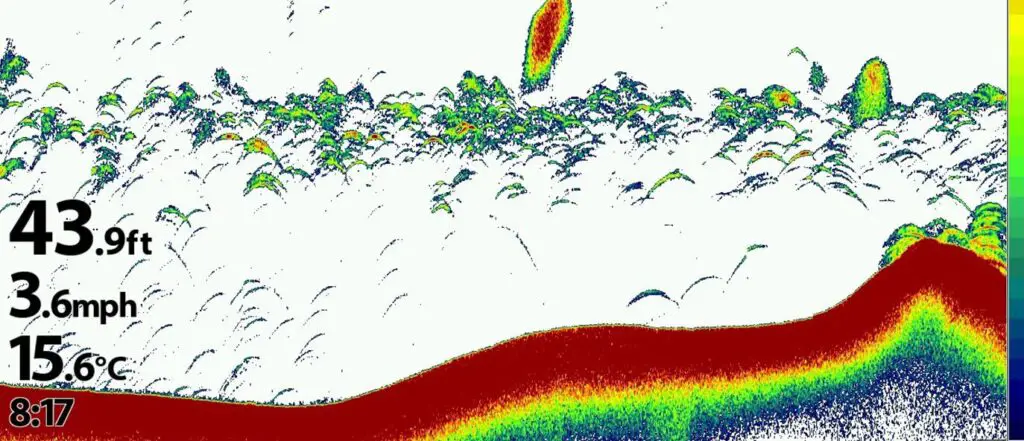
According to captain Andy Platko, a U.S.C.G. Master Captain and a P.F.B.C. Licensed Charter Captain, 2D sonar or traditional sonar represents the oldest type of technology. These sonar devices feature a round transducer that sends out a wide cone-shaped beam.
2D fish finders work with lower wave frequencies ( 50kHz or 200kHz) and are better for deeper water. They produce a less detailed image but cover more space in less time.
If you want to learn more about 2D sonar devices, watch the video below:
CHIRP Sonar
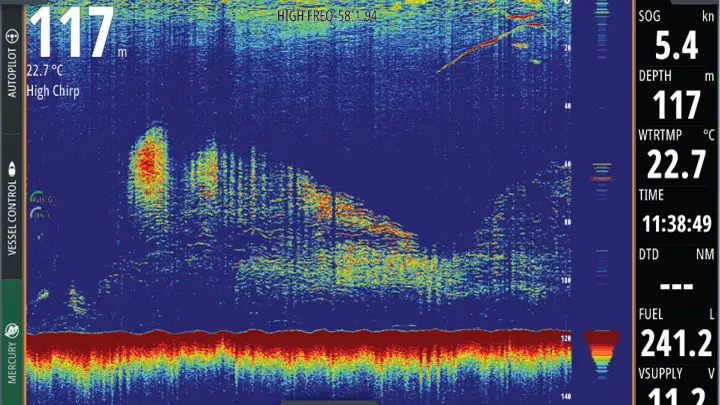
CHIRP sonar (Compressed High-Intensity Radar Pulse sonar) is a modern version of 2D sonar technology present in many contemporary fish finder devices. It also features a round transducer and produces a signal in the form of a round sonar cone. The difference is that this time, the transducer is broadband and can send out sonar signals across more than one frequency (high, medium, and low frequency).
As a result, CHIRP sonar is more reliable than traditional 2D sonar, which uses only a single frequency, as confirmed by the famous Garmin company experts. Therefore, if you want a more detailed image that is easier to interpret, opt for CHIRP sonar rather than traditional 2D single-band sonar.
Down Imaging Sonar
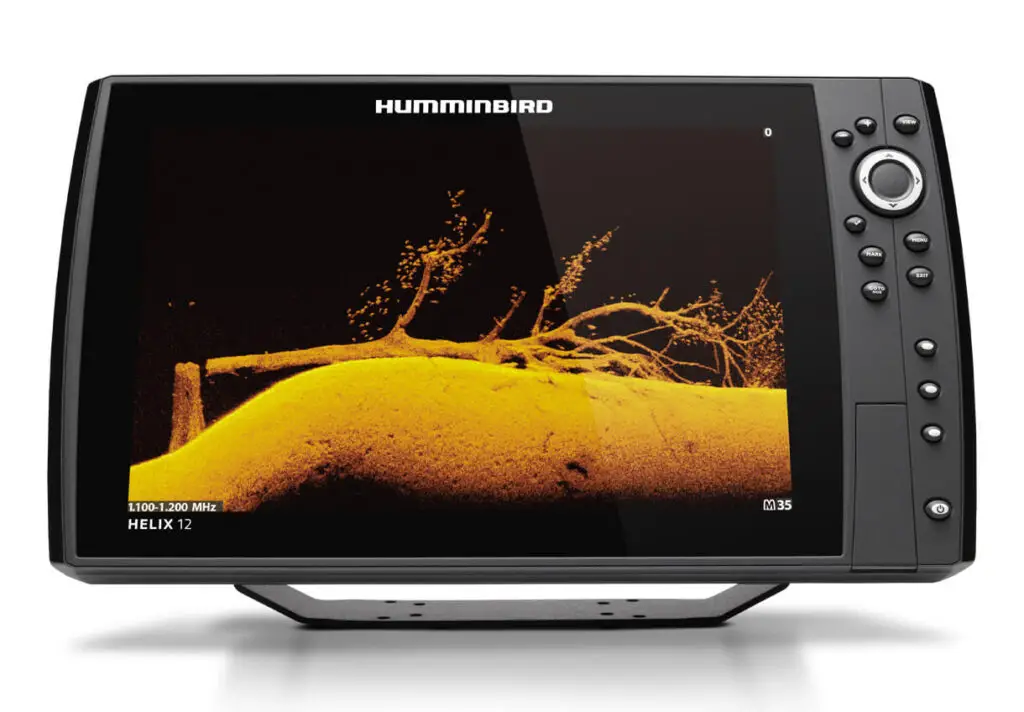
Down-imaging is a popular sonar technology used in modern fish-finding devices. I was surprised to discover that the term “down imaging” is actually a trademark of Hummingbirds and other brands use different wording such as DownScan, DownVision, etc.
Unlike traditional 2D sonar, down imaging devices use a rectangular transducer that emits a narrow frequency sonar beam into the water.
As I have read in yet another CH Marine article, down imaging devices produce highly detailed images that are very easy to interpret. The greatest disadvantage is that the field of view is much narrower, and it thus takes more time to cover larger areas of water.
Watch the video to find out more about down-imaging:
Side Imaging Sonar
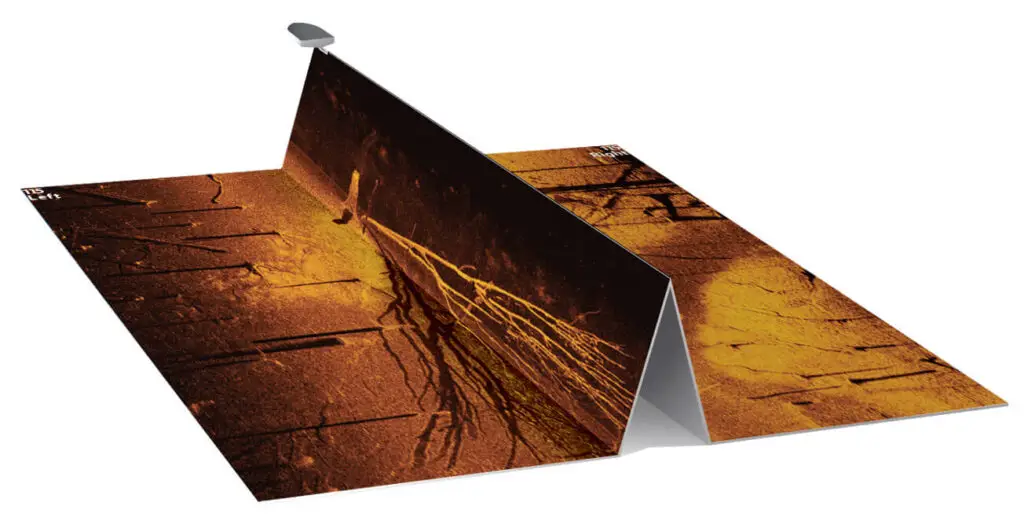
Side imaging sonar uses more or less the same sonar technology as a down imaging sonar, and you can read more about it in the open-source article written by Jun Yan, Junxia Meng, and Jianhu Zhao from Anhui and Wuhan University. As the name suggests, the main difference is that it points to the side of the boat rather than downward, toward the bottom.
You can direct your side imaging sonar to either side of your boat and it will help you locate fish and identify underwater objects in that area. The field of view is larger than that of down imaging sonar, but the image is not as detailed.
To learn more about side imaging, check out the following video:
How To Read A Fish Finder?
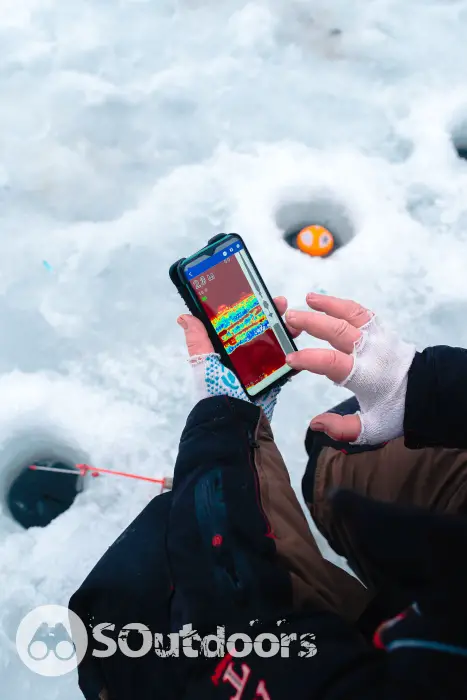
Unfortunately, images you can see on a sonar display are not anything like camera snapshots. You have to know how to read fish finders, or you’ll have little use for them.
How To Interpret 2D Sonar Images?
When you receive the 2D sonar image, the newest readings are shown on the right side. If you are not moving, the bottom will look flat. If there are any larger fish underneath your boat, they will appear as an arch or a round mark. You will see the full arch only if the fish swims through the full sonar cone. Bait fish usually appear as small dots suspended in the water.
If you are moving, groups of fish or underwater vegetation can show as blobs on the screen.
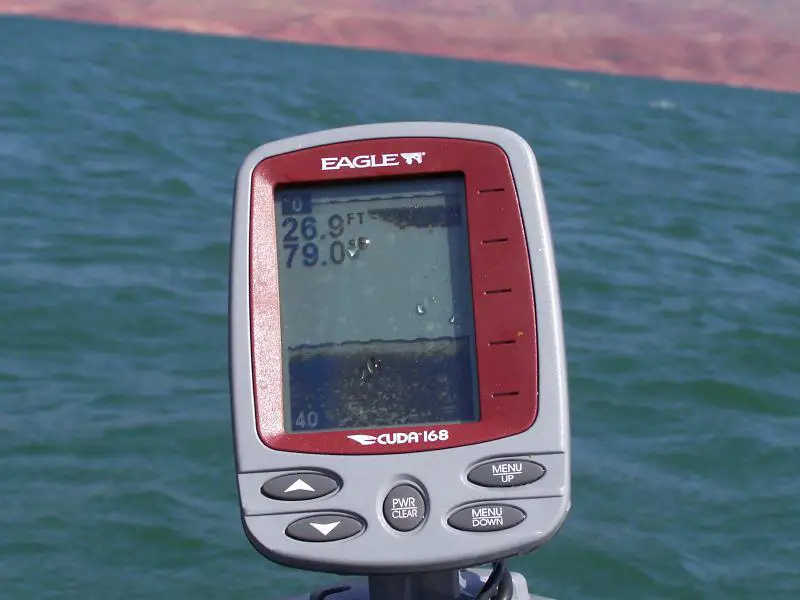
In this case, you have to check if the depicted object has a connection to the bottom to determine whether it is a fish. As I have learned from the article on the Garmin website, fish that are close to the water’s surface cannot be seen due to sonar noise, (pictured on image #1) which often shows in that area. Some of the Garmin fish finders can remove this noise.
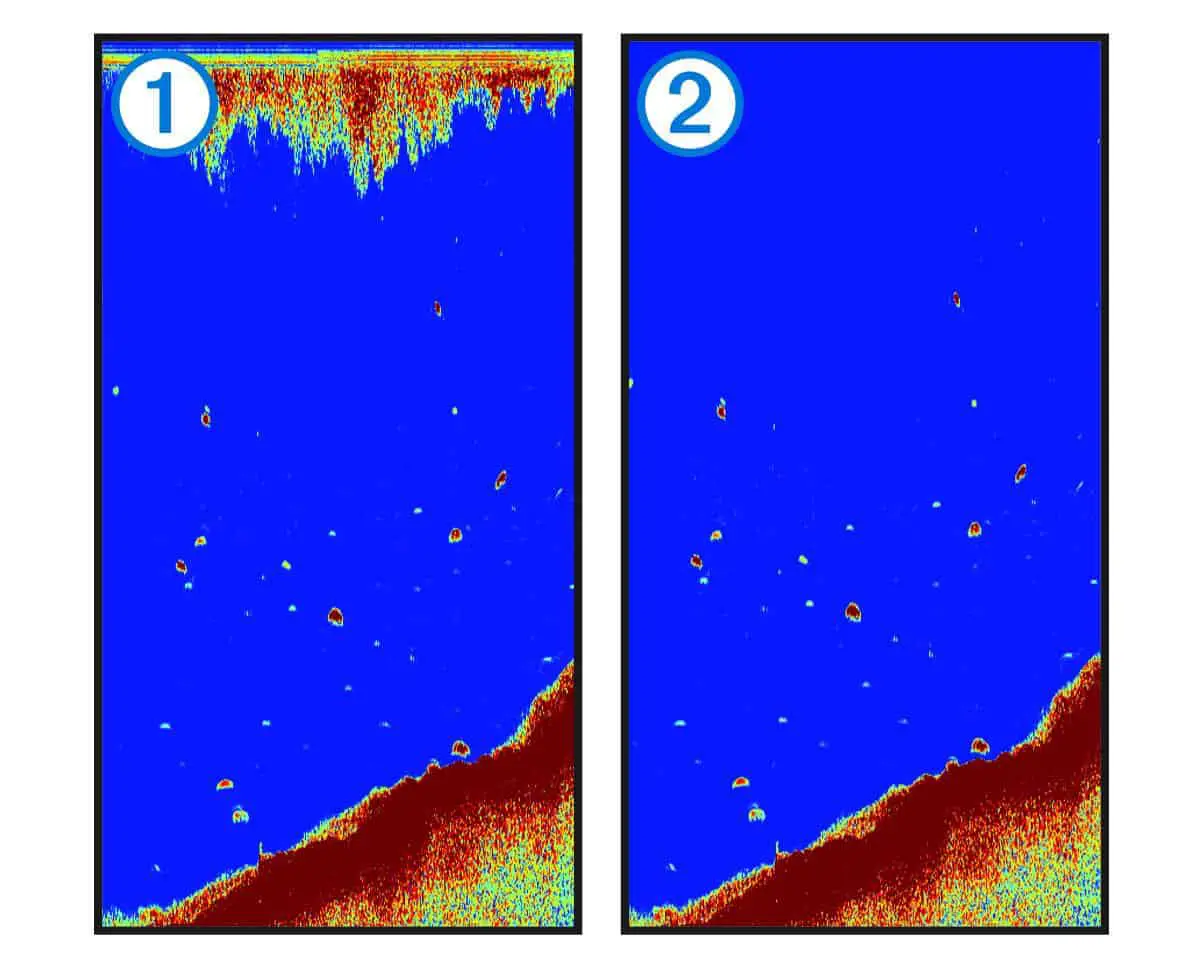
What about color seen on sonar? What does it mean?
It all depends on the color palette of your device, but typically, hard bottom shows up in a yellow color (usually with a thick blue band underneath it), while a muddy bottom appears more orange. Bait fish might have a bit cloudy look, but large fish with a solid mass reflect a much stronger signal and thus show a solid color on the screen. The stronger the color, the bigger the fish.
You should know that many fish finders allow you to change the color palette. I have also seen fish finders that do not display any color, but rather gray-scale images. As long as you remember that darker shades represent objects and fish that reflect a stronger signal, you’ll be able to identify what is underneath your boat, despite the lack of color.
How To Interpret Down Imaging Sonar Images?
From my point of view, down-imaging images are much easier to interpret, as they are more detailed and clearer. First of all, fish appear smaller than in traditional sonar. They usually appear as white dots, ovals, or circles, either stacked on top of each other or spread out on the bottom.
It is interesting to know that all the fish you see on the sonar screen have a shadow, as well. The closer the fish and its shadow are, the closer that fish is to the bottom.
According to Humminbird pro, Chris Zaldain, all eyes are different, and that is why there are different color palettes. Yet, regardless of the color palette of your down-imaging device, hard bottom always looks brighter than soft bottom. It also typically has a thick band of color underneath it. It is thus easy to identify when the bottom changes from mucky to rocky or gravel.
How To Interpret Side Imaging Sonar Images?
When using side imaging, you observe objects from the side, not from above, and that is why they might be a bit more difficult to spot and distinguish. The simple rule is to look for anything that appears brighter (like it is lit up).
Once again, you’ll be able to see the shadow, too. The same rule applies. The closer the shadow and an object or fish are, the closer that object or fish is to the bottom. In my experience, the only problem you might encounter is if the fish are very close to the hard bottom, as they will blend in with it.
What Is Fish ID & Should You Use It?
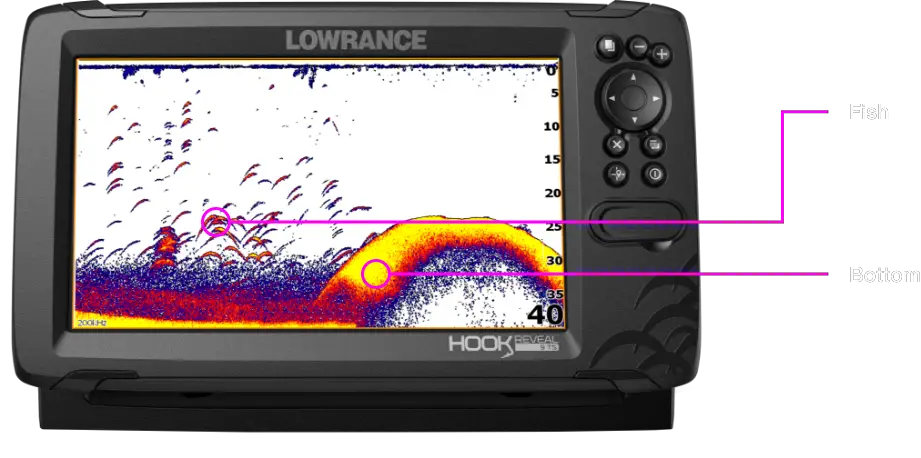
Using Fish ID or Fish Reveal technology is a matter of preference. It serves to help anglers determine the exact location of fish in relation to the sonar cone. Some fishermen I talked to like to interpret images on their own, while others prefer leaving that to the Fish Reveal which is described by the experienced retailers at CH Marine.
Once the Fish Reveal identifies the fish on the sonar image, it replaces it with a fish icon. When using Fish Reveal under the narrow frequency band, fish arches appear orange. When you use it under a wide band, they appear blue. It does the same for other objects too. Every underwater object has its corresponding icon or color.
The problem is that this technology makes mistakes. I have had an unpleasant experience with this, too, when the Fish ID showed me a school of fish that turned out to be weeds, and I was left empty-handed. Therefore, relying solely on technology is not always a good idea.
FAQs
Is it worth having a fish finder?
It is worth having a fish finder, especially if you know how to use it. Modern fish finders help anglers identify fish and the bottom structure underneath or beside their boat. As a result, they can plan where to cast their bait to catch fish they have always dreamt of.
Do you have to be moving for a fish finder to work?
You have to be moving for a fish finder to work. Fish finders work similarly to an MRI. The laser-thin sonar waves must move past a fish or an underwater object to take hundreds of thin image slices and combine them for a high-detailed image you see on the screen.
How deep does a fish finder work?
How deep does a fish finder work depends on the type and model of the fish finder. It also depends on the frequency of sonar you’re using. In general, lower frequencies penetrate water deeper.
What is the easiest fish finder to use?
The easiest fish finder to use is one that does not have too many features and is easy to interpret. Many modern fish finders are suitable for beginners, but I recommend the Lowrance HOOK Reveal as it can be used right out of the box.
Does a fish finder show depth?
A fish finder shows depth and can thus double as a depth finder too. It does not measure the depth directly, though, but rather uses a set of algorithms to calculate it from the time it took sonar signals to reflect back to the transducer.
What frequency should my fish finder be on?
You should decide what frequency your fish finder should be on depending on your fishing style and preferences. A high-frequency sonar is best for shallow water and high-precision imaging, while lower frequencies penetrate deeper into the water.
The Bottom Line

There are many things to consider when buying a new fish finder, especially considering you have to choose between a traditional unit, a CHIRP sonar, or different down imaging or side imaging devices (for example between a Garmin SideVu and Humminbird Side Imaging). To do this, you must first understand how they work. I have seen people investing in the most advanced fish finders yet having no use for them. Avoid making the same mistake.
I hope I’ve helped you understand the basics. To advance your knowledge, you should best get real-life experience using a fish finder on the water. If you need my help, leave me a note in the comment section, and I’ll get back to you.
