Most skilled anglers have had at least one nerve-wracking experience with a line twist or a tangle. I know I did. If you had a fair share of casts, you probably did, too. Sooner or later, most beginners go through it.
Imagine casting your bait only to discover a tangled mess resembling a bird’s nest coming out from your spinning reel. It sounds disturbing, doesn’t it?
It is indeed, especially if it costs you a big fish.
For this reason, you should learn how to spool a spinning reel the right way. Once you master positioning the line on a spinning reel, you’ll have no trouble with line twists and notorious bird nests.
So, the question is: Do you want to make line twists and tangles a thing of the past? Are you ready to sacrifice a couple of minutes to do it?
If yes, stay with us and learn how to put a line on a spinning reel correctly!
Table of Content
- The Two Best Methods To Spool A Spinning Reel
- Method 1: On Your Own
- Join Your Fishing Rod And Fishing Reel
- Match The Direction Of Your Reel And Line Spool
- Open The Bail & Remove Any Old Fishing Line
- String The Fishing Line Through The Line Guides
- Tie An Arbor Knot
- Cut The Extra Line
- Close The Bail And Put The Spool On The Floor In Front Of You
- Start Loading The Fishing Reel
- Pause After Every 20 Cranks
- Make Sure You Leave Enough Space When You Load The Line
- Cut The Line Close To The Supply Pool
- Secure The Fishing Line Onto The Reel
- Congratulate Yourself!
- Method 2: With A Friend
- Helpful Videos
- FAQs
- Final Observations
The Two Best Methods To Spool A Spinning Reel
Spinning reels are a valuable asset on the water and quite easy to master, too. However, your spinning reel can be rendered useless if not spooled properly.
It is quite a simple process. You can do it by yourself or have a friend help you out.
Method 1: On Your Own
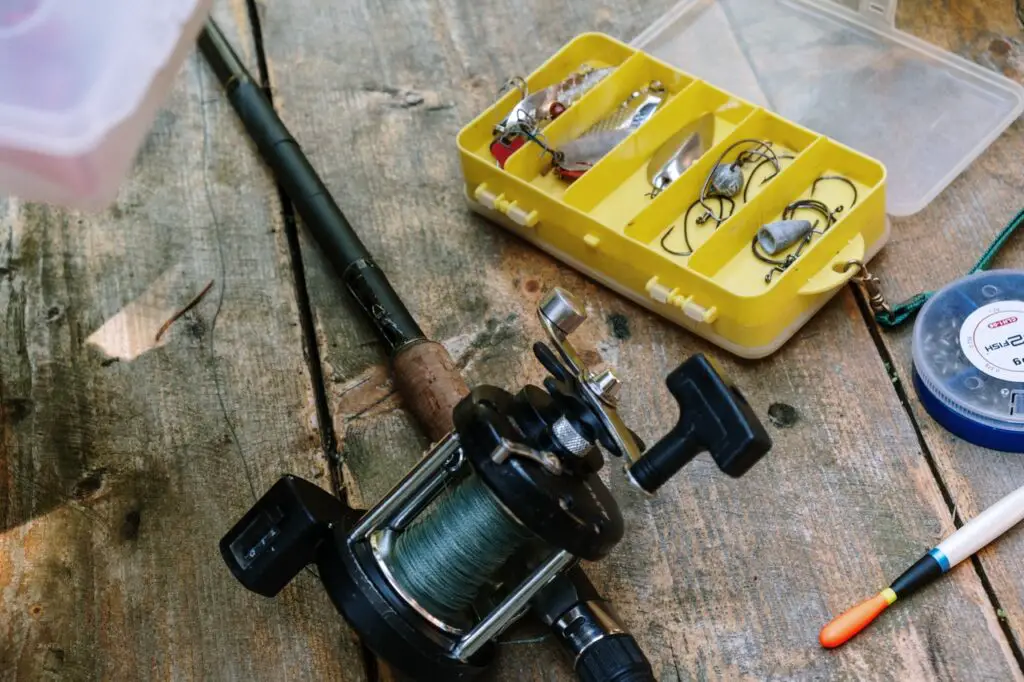
What Will You Need
- Spinning rod
- Spinning reel
- Spool of fishing line*
*Check the line capacity (the specific line weight your reel can withstand). It is usually printed on the reel’s spool. Remember that too much line results in tangles and wind knots!
Extra Tip: Choosing The Best Type Of Line
Opt for monofilament lines when using floating bait, jig, or live bait. In crystal clear or shallow water, go for nearly-invisible fluorocarbon lines. Braided lines are a perfect choice when using topwater bait or bottom fishing.
Step By Step
around five minutes 5 minutes
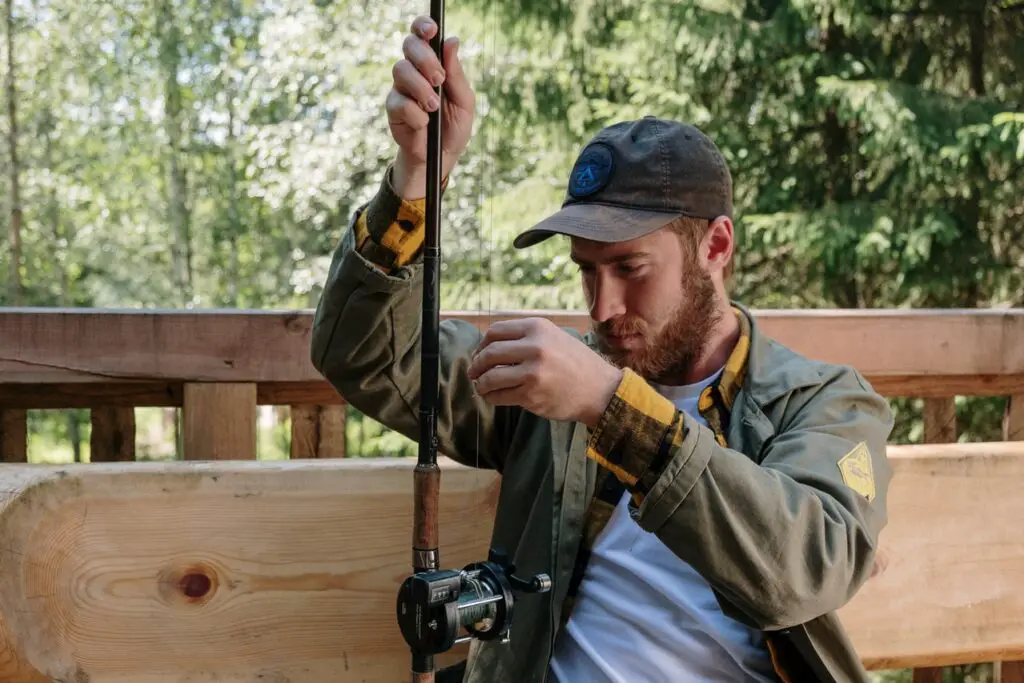
Join Your Fishing Rod And Fishing Reel
Connecting the fishing reel to the rod will make the fishing line installation a breeze!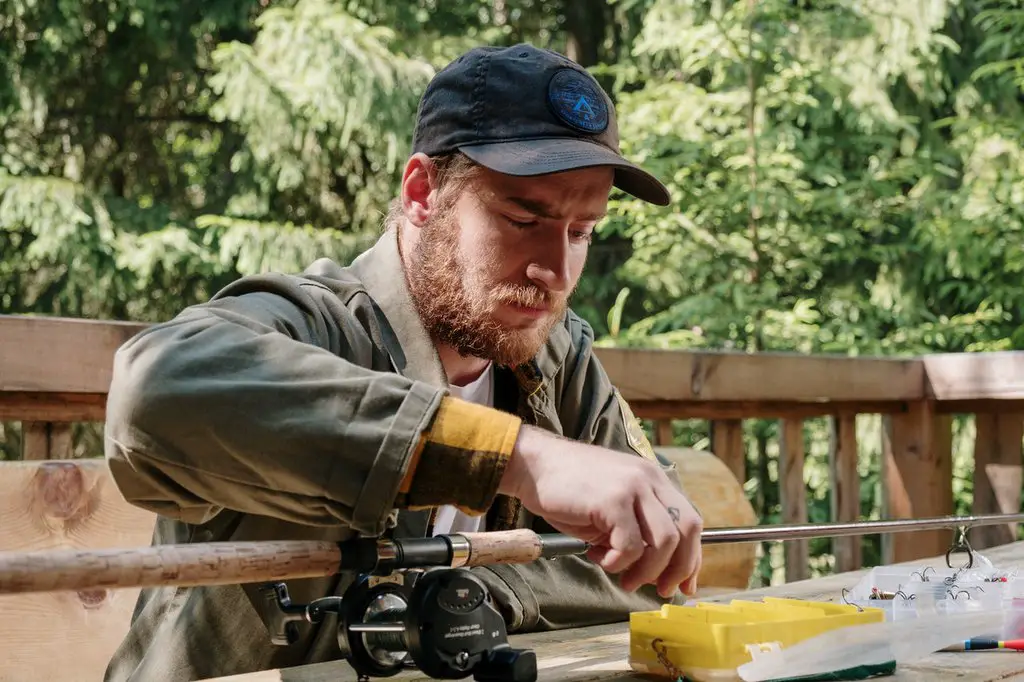
Match The Direction Of Your Reel And Line Spool
To determine the direction of your fishing reel, turn the wheel a couple of times and observe if the reel spins counterclockwise or clockwise. The new line should be spooled onto the reel in the same way.
Open The Bail & Remove Any Old Fishing Line
Open the bail (a small wire handle on a fishing reel) by flipping it up, and check if there is any old fishing line left on your spool.
You can either completely remove the old line or choose to leave a part of it as backing. If you opt for the latter, it would be best to attach the old line to the new line with a uni knot.
If you skip opening the bail, you will have to cut the line and redo the whole process again! So, take your time and always double-check if your bail is opened! It might save you a lot of time later on.
String The Fishing Line Through The Line Guides
Pick the end of the new line and string it through the first guide (the one next to the reel sit).
You can pass the line straight through all the guides if you prefer, yet, it is not obligatory.
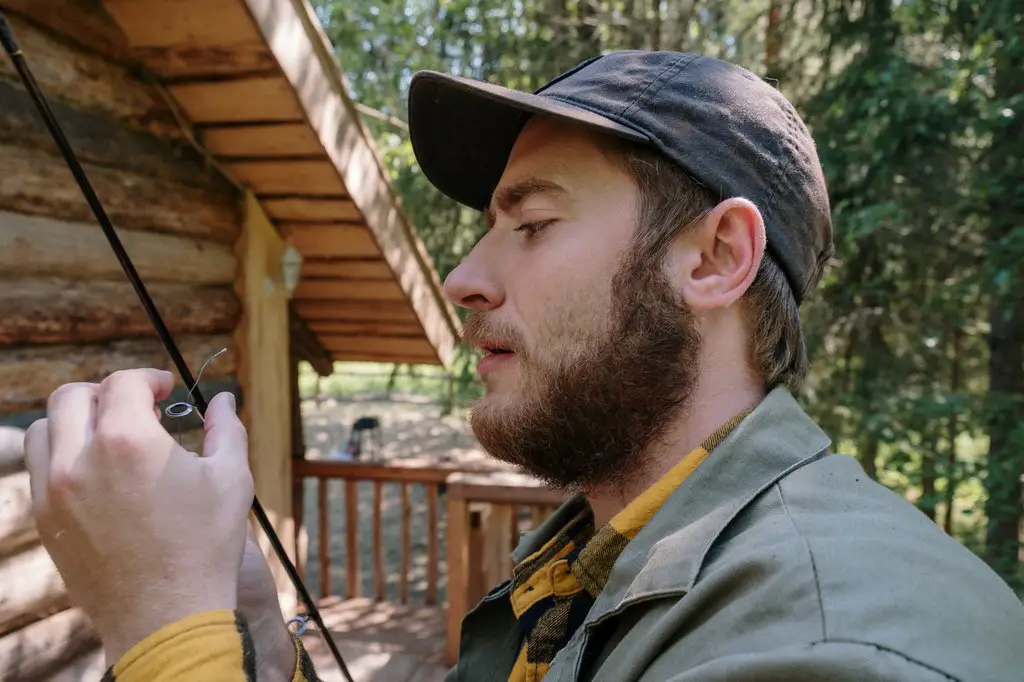
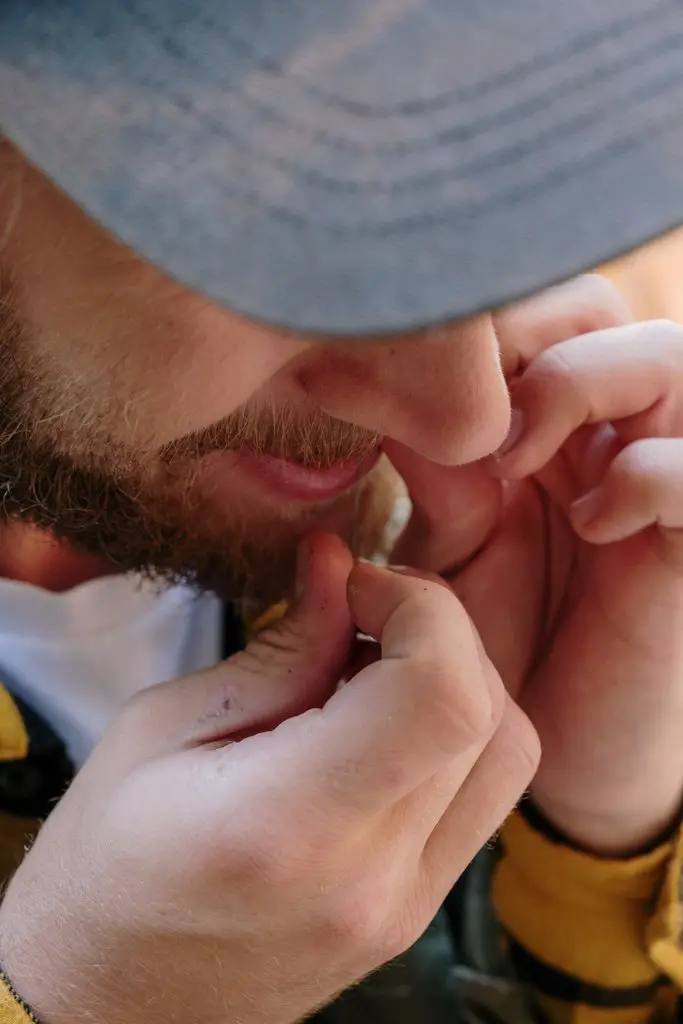
Tie An Arbor Knot
Secure the new line to the reel spool by tying an arbor knot (double overhand knot). If you want to learn how to do it, check out the video below.
You can tie a simple overhand knot or a bit more complicated uni knot, too.
Cut The Extra Line
You should leave about a quarter-inch (0.63 cm) of line past the knot. If the tag end is too long, cut the excess line with line cutters or scissors (you can bite it off if you can, too).
Close The Bail And Put The Spool On The Floor In Front Of You
Close the bail and then lay the spool flat on the floor before you. Make sure the label on the reel’s spool faces upwards to avoid line twists.
If the line is twisted or doesn’t line up, flip the spool over and give it another go.
Start Loading The Fishing Reel
So far, so good, but it was the easy part! It is now time to carefully load the reel.
Stand up and hold your rod in a parallel position to the ground. Pinch the fishing line approximately 12 inches (30 cm) above the reel. Start cranking the reel while slowly letting the line slide through your fingers.
Pause After Every 20 Cranks
You need to make sure the line does not twist while putting line on the spool. Hence, take your time and stop after every twenty cranks to inspect if there are any twists to be straightened.
You can spray a bit of line conditioner to make sure the new line loads onto the reel smoothly. It is an excellent no-line-twist hack for you to remember!
Make Sure You Leave Enough Space When You Load The Line
You should load the mono line onto the spool until you get about one eight-inch (0.32 cm) away from the rim.
The braided line should be loaded up to about 1/16″ away from the top of the reel. If you put less than that, you’ll hinder your casting distance.
Do not overload your reel spool by filling it to the very edge!
Cut The Line Close To The Supply Pool
It is time to cut the line once again. If there is too much line, cut it near to the supply spool but make sure to leave a small amount of excess line so that you can secure it.
Secure The Fishing Line Onto The Reel
Some spinning reels include a clip to secure the end of the line, or a tab to tie the line around.
If your fishing reels come without it, you can use a lure, a swivel, or a piece of electrical tape to prevent the line from coming undoneand slipping through the guides.
Some anglers use a rubber band to fix the free end of the line onto the reel, too.
Congratulate Yourself!
You are done spooling line onto your spinning rod – all by yourself! Go out on the water and have a great fishing experience!
If you had trouble following these steps, watch the video further down.
Extra Tip: A No Line Twist Hack
Before spooling your spinning reels, soak the line in warm water for about ten minutes. It will help straighten it up and prevent it from twisting.
Method 2: With A Friend

What Will You Need
- Spinning rod
- Spinning reel
- Spool of fishing line
- Screwdriver
- A friend (preferably a fellow fisherman)
Step By Step
- Put The Spinning Reel Into The Reel Seat
Place the fishing reel into its seat. Make sure that the spool is tight enough to remain in place.
- Make Sure Both Spools Have The Same Orientation
If your reel spool winds in a clockwise direction (which is usually the case), the line spool should unwind in that same direction.
- Open The Bail & Pass The Line Through The Rod’s Eye
Run the fishing line through the bottom of the rod’s eye. Do not forget to open the bail first!
As we have already established, if you leave the bail closed, you’ll have to cut the line and start from the beginning.
- Tie The Line Around The Spool
Tie the line in the same way as explained in the first method. The Arbor knot is the best knot for the job. Make sure you make it very tight.
Take care how much line you detach – 5- 6 inches will do it!
- Ask Your Friend To Help You By Holding the Line Spool With A Screwdriver
Place two chairs about 20 feet apart – one for you and one for your friend. Your friend should sit down, insert the screwdriver in the center of the spool, and hold both (he must use a cloth to cover the spool while holding it!).
You should also have a seat while holding the rod and the reel.
- Start Winding The Line Around The Spool
Raise the fishing rod and start winding the line slowly. Your friend should try to maintain slight pressure on the line spool in order to keep the line tight. You ought to tighten the drag and give your best to keep the reel in place.
Watch for your friend’s fingers. If you notice any sign that the line is becoming hot, take a break.
- Stop Winding On Time
If you overload the spool with a line, you increase the chance that it will twist or get tangled when casting. Hence, stop winding before you cover the lip between the reel line and the top of the spool.
- Tie The Leader
Press the line to make sure it is not too loose (if it is, you’ll need to redo the entire process!), and if you are satisfied with the results, tie your leader.
If you have used the braided fishing line, I highly recommend tying an FG knot. Keep scrolling, and you’ll find a video to help you do it!
- Say Thanks To Your Friend For Helping You!

It is time for the two of you to go fishing and enjoy a great time on the water!
Extra Tip: Storing The Fishing Lines Properly
When you are not using your fishing lines, store them away from direct sunlight and heat. If you do not use lines for a couple of years, they will deform, and you should best dispose of them and buy new ones.
Helpful Videos
If you are a visual learner, you might benefit from watching a video on how to put a line on a spinning reel, so here it is:
The Arbor knot is the best knot for securing the line to the spool of a fishing reel, and you must learn how to tie it. The following video will help you figure it out in a nick of time.
Braided lines have many perks, including higher sensitivity and breaking strength. They also allow for greater casting distance. Here is how to tie an FG knot and connect the braided line to the leader line:
FAQs
Do you put line on a spinning reel clockwise or counterclockwise?
You usually put the line on a spinning reel in a clockwise direction, but sometimes you should do it counterclockwise. Determine the right way by observing the front of the reel as you turn its handle. The direction the bail arm turns is the same direction to unwind the line.
Should you wet fishing line before spooling?
You should wet the fishing line before spooling to reduce friction and memory. It is best to leave the mono line soaking in the water for at least a couple of hours. The braided line does not require soaking.
Which fishing line tangles the least?
The braided line tangles the least. It has almost no memory, and thus it runs freely without twisting or tangling up.
Which way does line go on a spinning reel?
The line goes on a spinning reel the same way your spool spins when you retrieve it. If the reel spool reels clockwise, the line ought to come at it clockwise, too. If you start reeling and notice “curlicues” at the entering guide, change the direction.
Final Observations
Choosing a spinning reel over a baitcasting reel has its advantages. However, you need to learn how to spool a spinning reel to become a better angler and avoid common issues, such as line twists and tangles.
You can buy one of the best spinning reels on the market, but it won’t do much good if you do not know how to spool it properly. Hence, when choosing the line, mind the line capacity of your reel.
Once you get that right, you can move on to piece together the essential gear for spooling a spinning reel and follow my step-by-step instructions. The good news is that you do not need much: your fishing reel and line will do the trick!
Having a friend to assist you comes in handy, as well. I hope I’ve helped you!
Please help me too by sharing this article. If you have any questions, feel free to leave them in the comment section.